


 Reply With Quote
Section 2 of 4:
I drained the tank, made sure my life insurance was up-to-date, and commenced drilling holes into my gas tank while it was 20ºF outside.
First step, I used duct tape to generally seal the hole. I also wadded up duct tape and stuck it in the tank, under the two bolts, to try and catch as much metal filings as possible when I drilled through.
Next I used a hacksaw blade to flatten the broken bolts as much as possible. You could probably do a better job with a Dremel saw or similar device I didnt have one.
A flat, level surface, on the broken bolt, is essential for drilling a straight hole.
The existing bolts take a 10mm nut. I wanted to utilize the round collar at the base of the broken bolts, so I chose to go one size smaller for the replacement bolts (8mm nut). You will need a quality metal drill bit and the thread tap for the appropriate bolt size. I also used a smaller metal drill bit to make a pilot hole first. This made the drilling much easier.
Use a metal punch to dent or scribe a dent on the bolt. This will keep the drill bit from wandering. Its important to drill as straight up and down as possible. Take your time and be patient. If you drill at any kind of an angle, your new bolt may not fit through the sending units hole easily (this happened on one of mine).
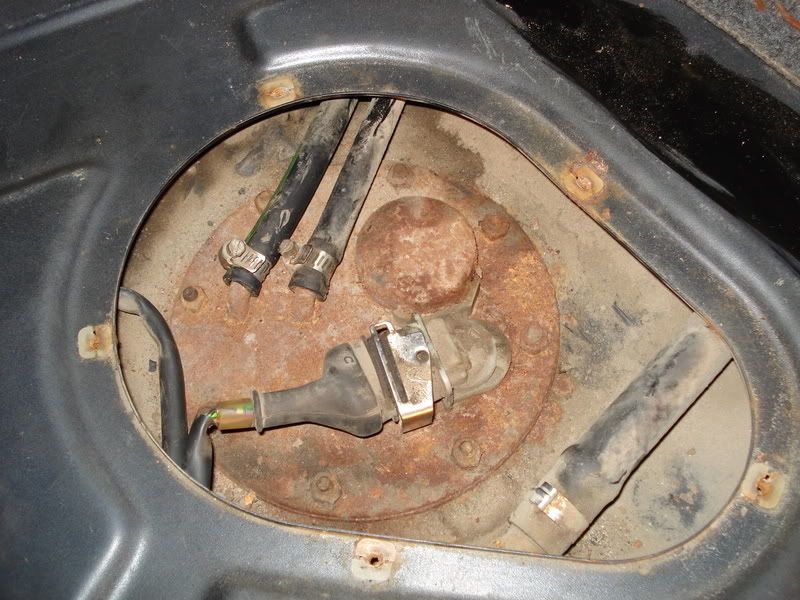
Here is the broken bolt after I drilled the new hole through it. Clean up the metal shavings as much, and as often as possible, to minimize what will fall into the tank.
Once the holes were drilled, it was time to tap the new threads. The round collars on mine were spinning, so I used a vise grip pliers to hold them as I turned the thread tap.
If youve never used a thread tap, they are easy to use, but unforgiving. Turn it a couple of turns, back it out, and clean it off. Then do it again a little further. Dont force it. You should feel it cutting the metal somewhat easily. If it gets hard to turn at all, stop and back it out. You can break the cutting teeth easily. I have two taps now to prove it.


 *
*
 "The gas pedal wouldn't go to the floor if it weren't meant to be there"
